Eclipse version : Mars 2
To be able to deploy and execute Java related systems or applications within an IDE and in this context is Eclipse IDE (Integrated Development Environment), first of all we have to install the Application Server.
Below is how we install it and integrate it with Eclipse Mars 2.
- Make sure you have already installed Eclipse Mars 2. For more information on installing on Eclipse Mars 2, you can visit the following link.
- You need to install and configure JRE runtime so it can be used for Wildfly Java Application Server to be launched and any other processes which is needed to be executed internally in Eclipse IDE such as compilation, program execution, deployments. In order to do it, we can check the following link.
- You also have to finish installing and to be able to run the Wildfly Java Application Server. For more information on installing and running the Wildfly Java Application Server, you can visit the following link.
- From Eclipse IDE, access server pane from the following menu :
Window > Show View > Other …
It is displayed as follows :
- Select and click on Servers as the View which is going to be showed :
- It will then the Servers pane appears in the Eclipse IDE as follows :
- Below is the detail image of the Server pane :
- Click the link inside the Servers Tab which has the text of “No servers are available. Click this link to create a new server …. It will then display the following window :
- Just try to scroll it down, so it will appear another version of Application Server which is appropriate in the context of this article. It is Wildfly 10 and it is displayed as follows :
And then we just have to click the Next button when the following window appears :
Pay attention to the dropdown list which has the value of Create new runtime (next page). If there are already defined a certain runtime before, it actually can be used. And it will then display the information of the runtime in the Runtime Details. Just select the dropdown list entry as the above window and click the Next button.
- By clicking the Next button, it will then display the following window :
Since we have installed it before in the third step. We can point out the Wildfly Application Server installation path directory by clicking Browse… for Home Directory entry. And we also have to pay attention to the JBoss Server runtime name because Eclipse IDE doesn’t allow more than one similar name.
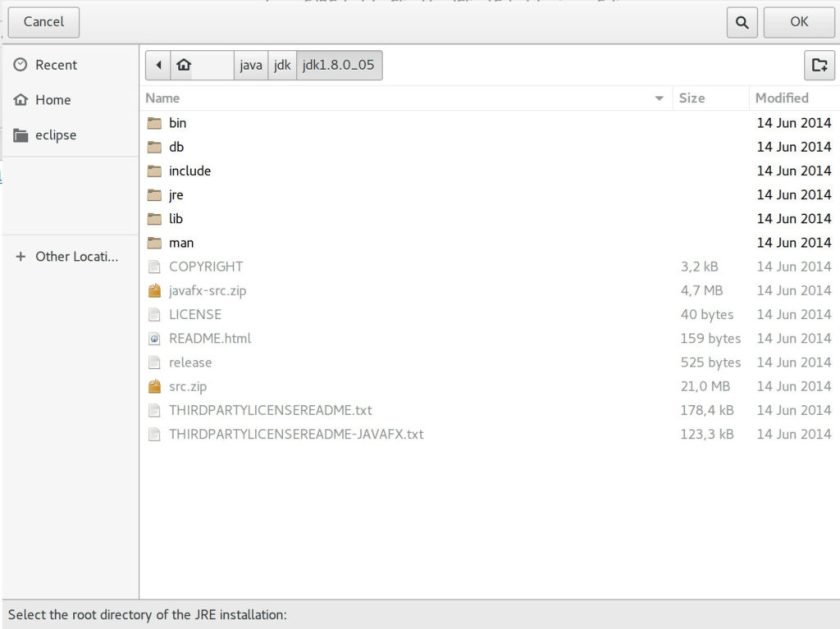
Below is the image display when the Browse… button is clicked :
- The other thing which is needed to be configured is the runtime JRE. It can be achieved by clicking the Environments… button. We are choosing JavaSE-1.8 for the runtime JRE which is used to launch Wildfy 10. The following window will be appeared :
As we can see in the above window, there will be a display of the already installed compatible JRE accordingly. The runtime JRE that has already installed and configured in the 2nd step. Click OK to go back to the JBoss Runtime configuration window. After that, click the Finish button.
- By finishing the 11th step, the Server pane will also have a new entry for JBoss Runtime server as shown below :
- To launch Wildfly 10, right click at the above Wildfly Application Server entry and then click the Start menu as follows :
- If the process of launching Wildfly 10 Application Server runs smoothly, there will be a change of status in the JBoss runtime Server entry in the Server pane as shown below :
- We can check it by accessing the following URL : http://localhost:8080 if we run it locally depends on your Wildfly 10 Application Server setting as shown below :