This is an article specifying an error message as its title. The error message is actually triggered when an application called virt-manager is being executed. The application itself, virt-manager is an application based on the manual page of Linux operating system where the application itself is installed specifically to be executed so that it can be properly functioned to display the virtual machine desktop management tool. In other words, in order to manage virtual machine in the desktop, virt-manager is one of the application provided and installed to do and perform the task.
In the context of this article, the virt-manager has already been installed is in a Linux operating system specifically Ubuntu Xenial 16.04. It is only a laptop which is exactly act as a client or workstation. But since virt-manager is installed, the laptop itself can act as a virtual machine management tool. Back to the error message, below is the image depicting the error message shown as in the title of this article :

To be able to solve the error shown above, the only way is just to directly check the source of the problem. As stated in the error message, virt-manager failed to connect to socket because the socket itself which is located in ‘/var/run/libvirt/libvirt-sock’ is nowhere to be found. Below are steps taken to solve the problem :
1. Check the libvirt-sock file. Below is the output of the real situation :
user@hostname:/var/run/libvirt$ ls -al
total 4
drwxr-xr-x 8 root root 260 Jul 25 16:31 .
drwxr-xr-x 48 root root 1540 Jul 25 16:31 ..
drwxr-xr-x 2 root root 40 Jul 25 14:30 hostdevmgr
-rw-r--r-- 1 root root 5 Jul 25 15:06 libvirtd.pid
srwxrwx--- 1 root kvm 0 Jul 25 16:31 libvirt-sock
srwxrwxrwx 1 root kvm 0 Jul 25 16:31 libvirt-sock-ro
drwxr-xr-x 2 root root 40 Jul 25 14:30 lxc
drwxr-xr-x 2 root root 100 Jul 25 16:31 network
drwxr-xr-x 2 root root 40 Jul 25 14:30 qemu
drwxr-xr-x 2 root root 40 Jul 25 16:21 storage
drwxr-xr-x 2 root root 40 Jul 5 14:30 uml-guest
srw-rw-rw- 1 root root 0 Jul 25 14:29 virtlockd-sock
srw-rw-rw- 1 root root 0 Jul 25 14:29 virtlogd-sock
user@hostname:/var/run/libvirt$
2. It can be seen based on the above output generated to see the content of the directory located in ‘/var/run/libvirt’, the file named libvirt-sock is exist. But apparently there is something wrong with the group ownership of the file. It is owned by a group named ‘kvm’.
3. Although the instruction is clearly described that to be able to run virt-manager the user executed ‘virt-manager’ must be a member of ‘libvirtd’ group. But that doesn’t mean that ‘libvirt-sock’ file must also be owned by the same group which is the ‘libvirtd’ group.So, try to look at the libvirtd configuration file which is located in ‘/etc/libvirt/libvirt.conf’. Check the content of the file :
#################################################################
#
# UNIX socket access controls
#
# Beware that if you are changing *any* of these options, and you use
# socket activation with systemd, you need to adjust the settings in
# the libvirtd.socket file as well since it could impose a security
# risk if you rely on file permission checking only.
# Set the UNIX domain socket group ownership. This can be used to
# allow a 'trusted' set of users access to management capabilities
# without becoming root.
#
# This is restricted to 'root' by default.
As shown in the above libvirtd configuration entry, there is no entry relates with socket group ownership and by default it is restricted to ‘root’. So, in order for virt-manager can gain access to a running libvirtd service which is binded in a certain UNIX socket and in this context it is represented in with a file named libvirt-sock, the group ownership of the socket must be adjusted.
4. Adjust the group ownership of the UNIX domain socket for libvirt-socket by adding the following entry :
unix_sock_group = "kvm"
4. After modifying the file, try to stop, start and then check the status of the libvirt service by executing the following command pattern :
systemctl stop libvirt-bin
The command above which is specifically executed for stopping the libvirtd service can be shown as follows :
root@hostname:~# systemctl stop libvirt-bin
systemctl start libvirt-bin
The command above which is specifically executed for starting the libvirtd service can be shown as follows :
root@hostname:~# systemctl start libvirt-bin
Don’t forget to check the status of the libvirt-bin service by executing the following command :
root@hostname:~# systemctl status libvirt-bin
Finally, the command above is executed to check the status of the libvirtd service where the following command is the execution in the real situation :
root@hostname:/var/run/libvirt# systemctl status libvirt-bin
● libvirt-bin.service - Virtualization daemon
Loaded: loaded (/lib/systemd/system/libvirt-bin.service; enabled; vendor preset: enabled)
Active: active (running) since Tue 2017-07-25 16:35:07; 5s ago
Docs: man:libvirtd(8)
http://libvirt.org
Main PID: 23406 (libvirtd)
Tasks: 18
Memory: 74.9M
CPU: 436ms
CGroup: /system.slice/libvirt-bin.service
├─ 2742 /usr/sbin/dnsmasq --conf-file=/var/lib/libvirt/dnsmasq/default.conf --leasefile-ro --dhcp-script=/usr/lib/libvirt/libvirt_leaseshelper
├─ 2743 /usr/sbin/dnsmasq --conf-file=/var/lib/libvirt/dnsmasq/default.conf --leasefile-ro --dhcp-script=/usr/lib/libvirt/libvirt_leaseshelper
└─23406 /usr/sbin/libvirtd
Jul 25 16:35:07 localhost systemd[1]: Starting Virtualization daemon...
Jul 25 16:35:07 localhost systemd[1]: Started Virtualization daemon.
Jul 25 16:35:07 localhost dnsmasq[2742]: read /etc/hosts - 91 addresses
Jul 25 16:35:07 localhost dnsmasq[2742]: read /var/lib/libvirt/dnsmasq/default.addnhosts - 0 addresses
Jul 25 16:35:07 localhost dnsmasq-dhcp[2742]: read /var/lib/libvirt/dnsmasq/default.hostsfile
root@hostname:/var/run/libvirt#
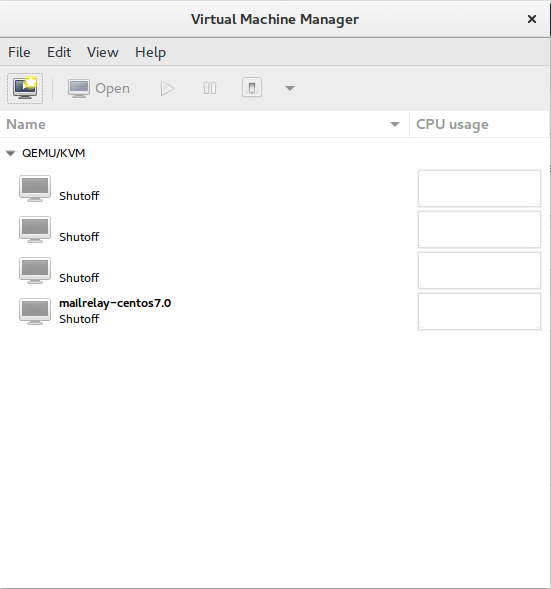
5. Last step, run the virt-manager as shown below :
root@localhost:/var/run/libvirt# virt-manager
root@localhost:/var/run/libvirt#
If there is nothing else that can be a hindrance or obstacle that can prevent virt-manager for accessing libvirt service, the following display of a running virt-manager can be shown as follows :