In the Eclipse IDE, as an Integrated Development Environment for Java programming language, it is important for Java developer to be able to execute, to run or even to deploy the systems or the applications which is being developed from inside the Eclipse IDE itself.
But to be able to perform those tasks, first of all we have to configure Java Runtime Environment in Eclipse IDE as follows :
- Access the menu which exists in Eclipse IDE as follows :
Window > Preferences
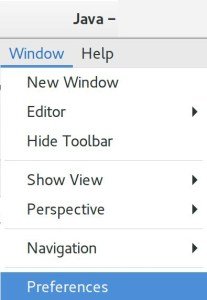
- By accessing Menu Preferences, Eclipse IDE itself will display the following Window Preferences :
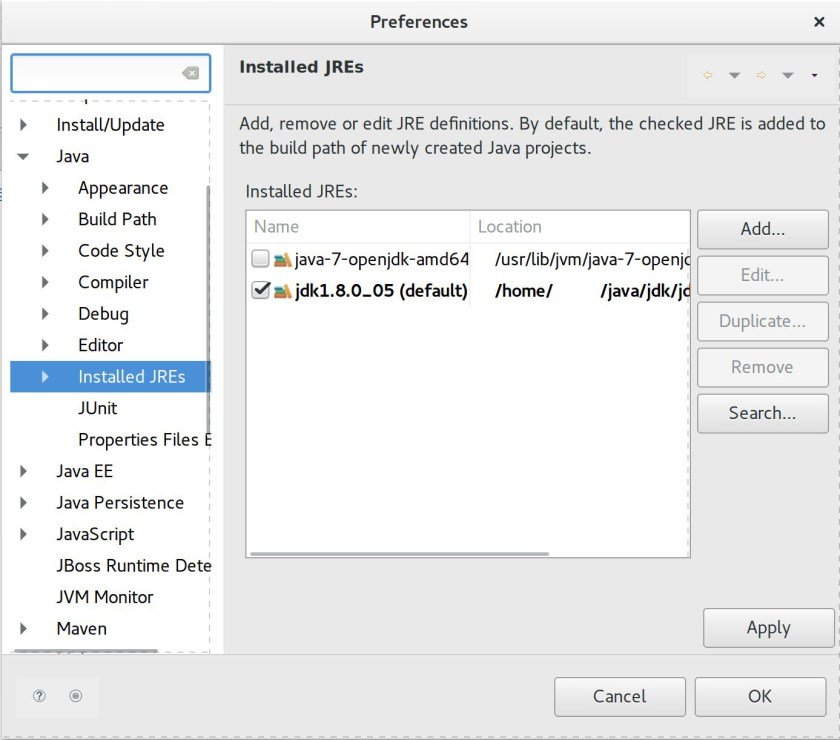
Selecting the installed Java Runtime Environment which can be used with Eclipse Java IDE.
- In order to add a new JRE (Java Runtime Environment), we can click the Add… button. It will then display the following window :
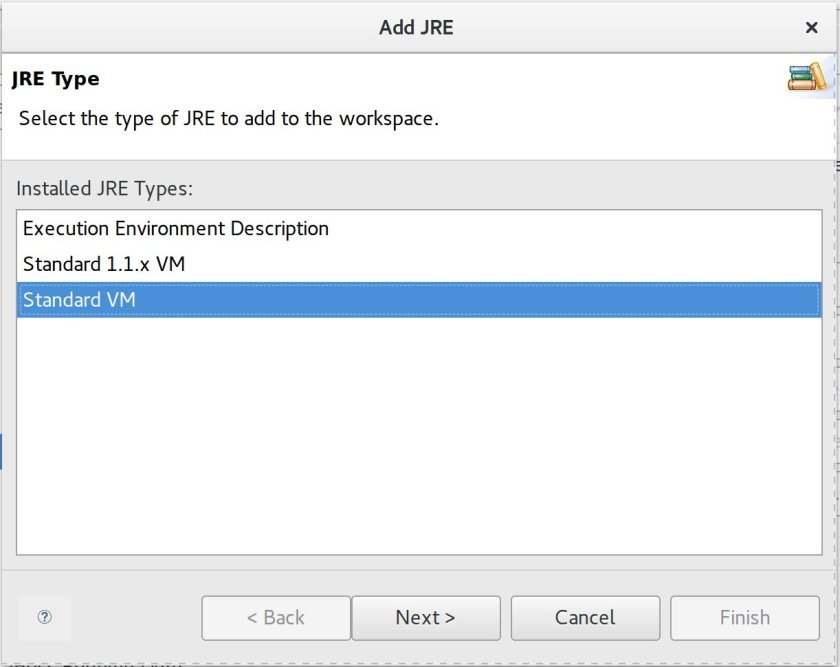
Choose Standard VM and then click Next button.
- By doing the above step, it will then display the following window :
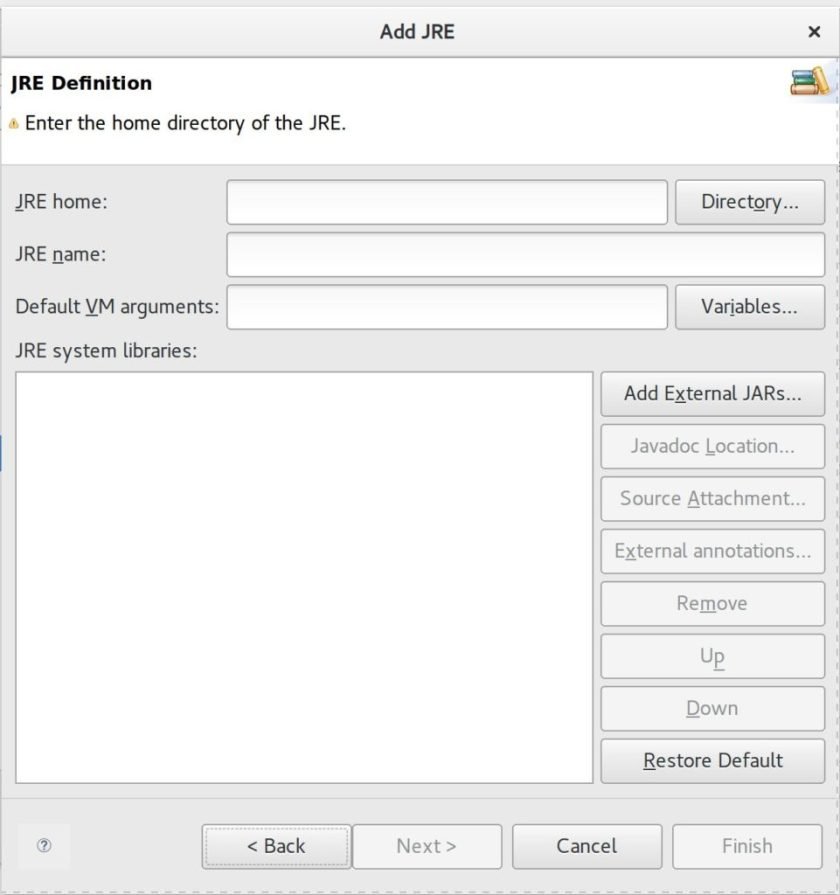
Displaying Java Runtime Environment Window for further definition inside Eclipse Java IDE.
- We have to choose the proper JRE (Java Runtime Environment) by selecting Java Runtime Environment folder installation by clicking Directory… button as follows :
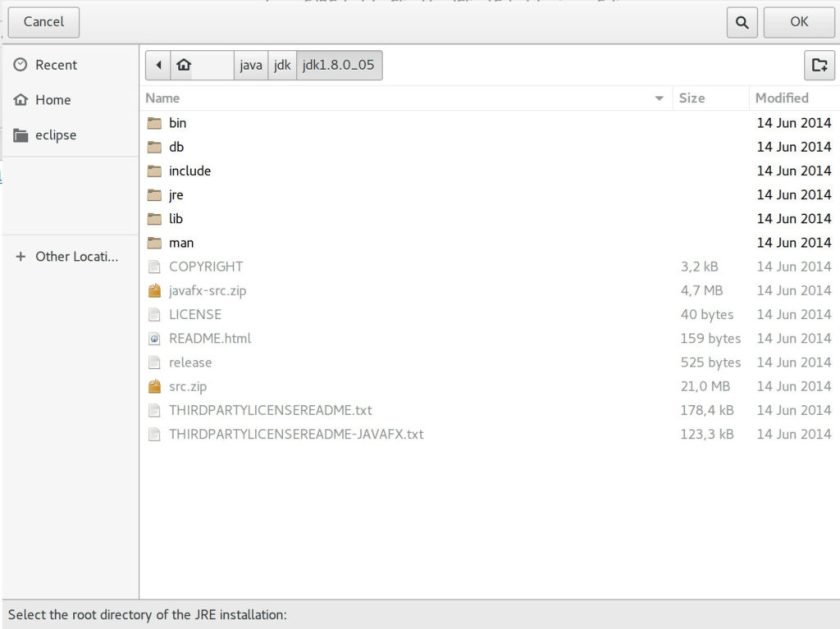
Selecting the root folder of Java Runtime Environment for the addition of new Java Runtime Environment inside Eclipse Java IDE.
- After clicking the OK button as shown in the above display, it will then appears the following window :
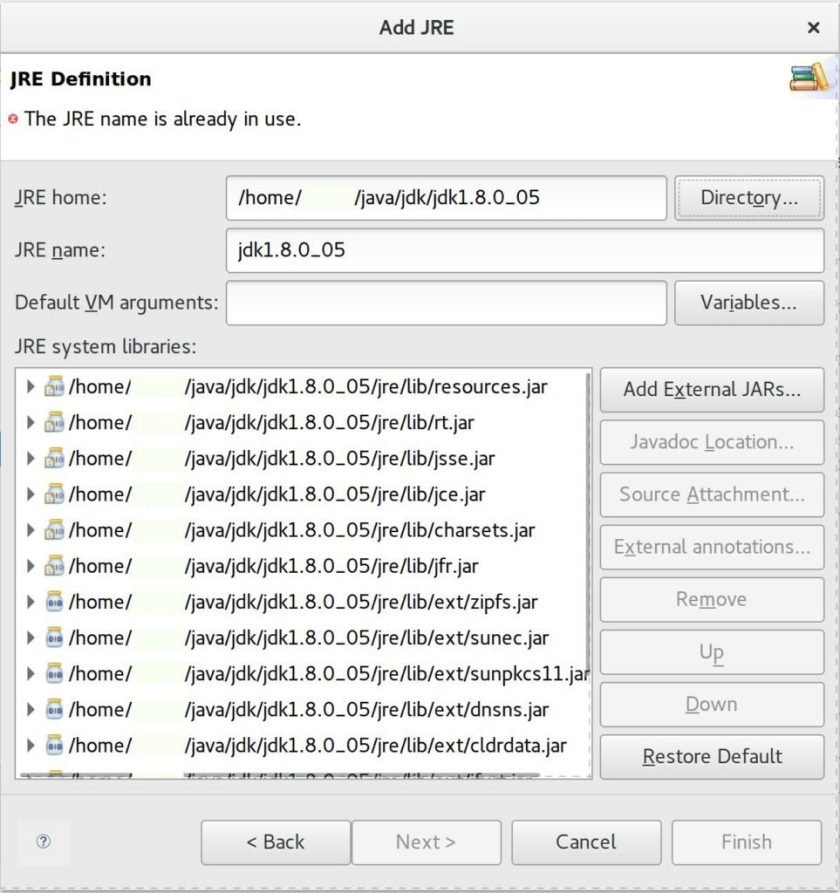
Displaying the already selected root folder path of the new selected Java Runtime Environment inside Eclipse Java IDE.
- There are an error which has to be fixed in the above entry. It is in the JRE name entry which is jdk1.8.0_05. Try to specify different name and it can be any kind of text which represent the jre itself. Since Eclipse IDE already have the JRE name of jdk1.8.0_05 and which is pointed to another path of installation folder and for the sake of an example of creating another JRE entry, it is necessary to specify different JRE entry name for the JDK 1.8.0_05 in other folder path installation as shown below :
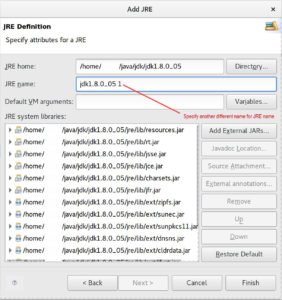
The above example are using jdk1.8.0_05 1 as the JRE name entry. By adding character 1, it is already a different JRE name and the configuration process can then move forward.
- The next step is about selecting which JRE is going to be used. Based on the JRE entry which has been configure previously, it will be chosen as follows :

- Click the checkbox in jdk1.8.0_05 1 as shown as follows :

- Click the OK button, so the process of configuring default Installed JRE which is going to be used in Eclipse IDE has already finished.
One thought on “Adding and Configuring Installed JRE in Eclipse IDE”